
Bi Xenon retrofit 50 pics "56K no!"

 02-16-2008, 09:33 AM
#1
MBWorld Fanatic!
Thread Starter
Join Date: Oct 2006
Location: Caribbean/Florida/Colorado
Posts: 3,642
Likes: 0
Received 11 Likes
on
11 Posts
E-ZGO 53hp., 1999 E 430 sport, 2004 E 55, 2008 Tahoe LTZ on 24"s
Bi Xenon retrofit 50 pics "56K no!"
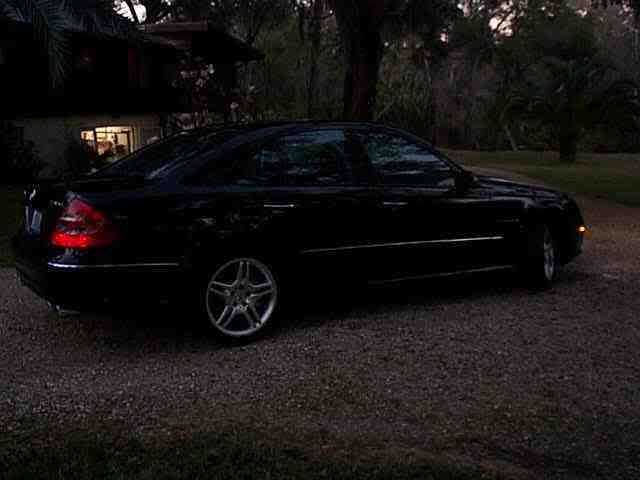
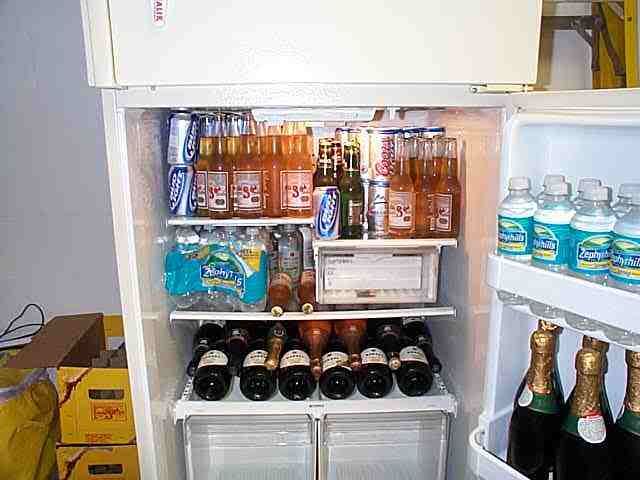
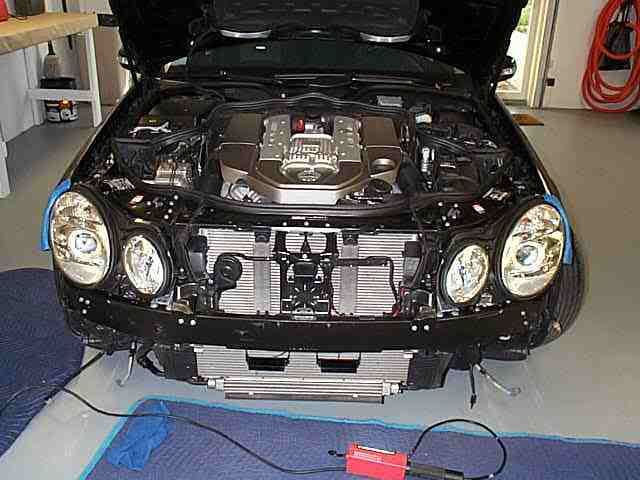
The beast in hibernation over the long winter.
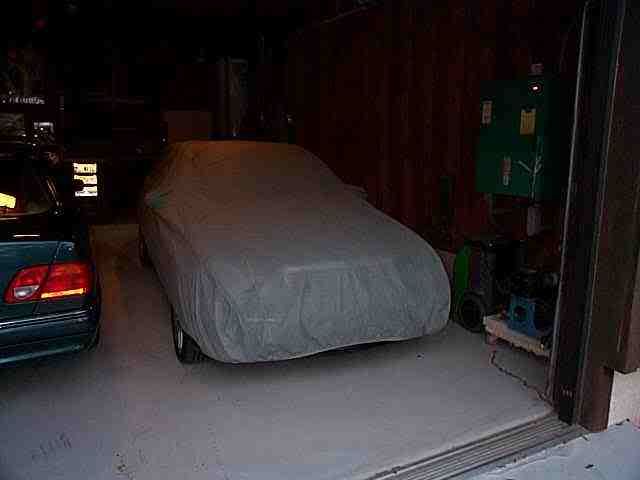
Time to wake up!
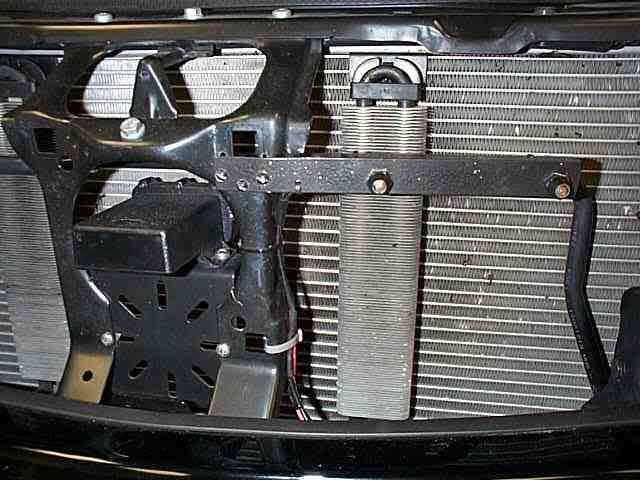
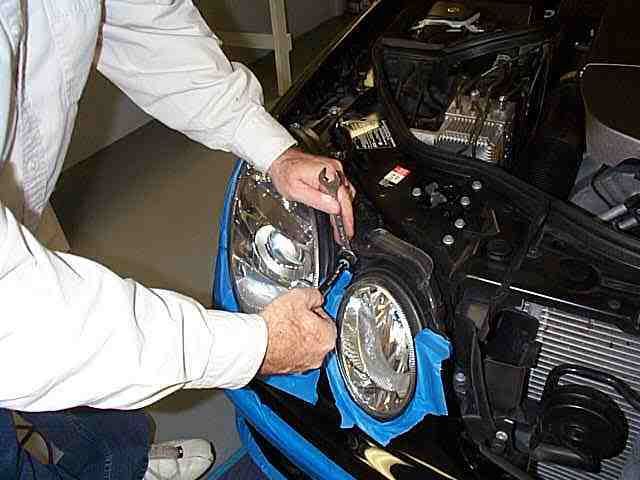
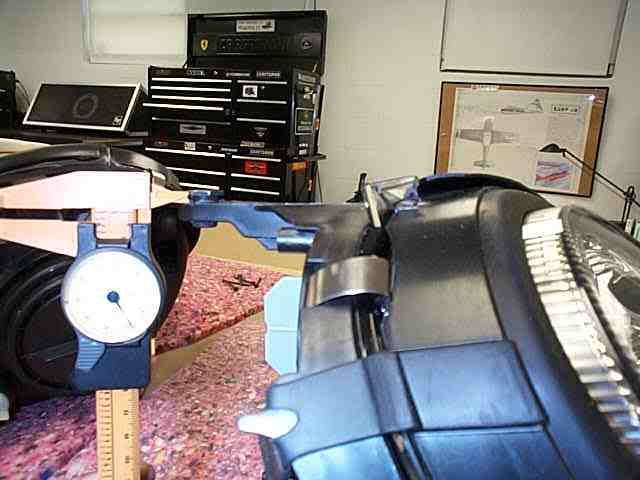
A good thing to do is study the fitment of your headlamps before the change out.
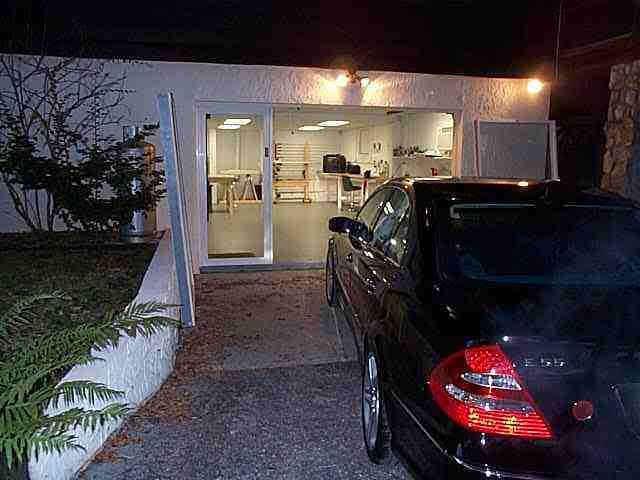
Short trip to the shop.
Just around the corner.
I use two plastic windows and a glass door to keep cold out and let the sun in when the garage door is open.
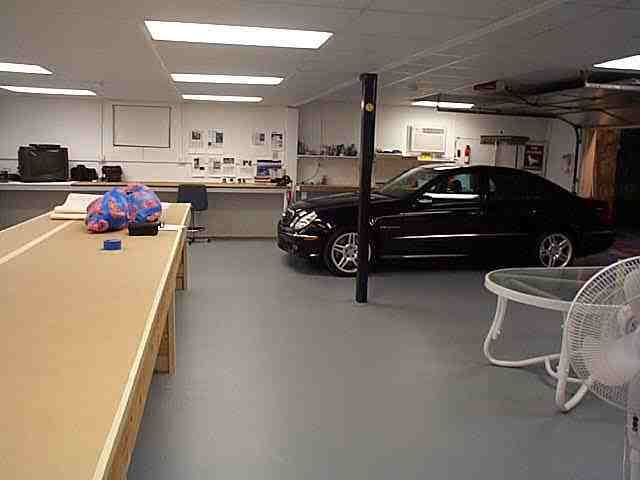
In position and ready to start.
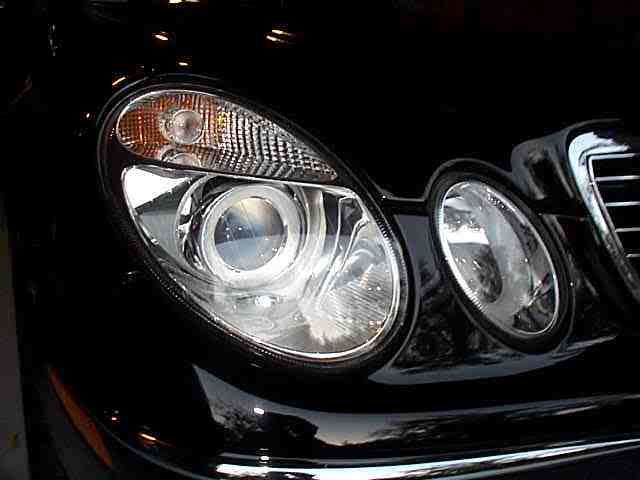
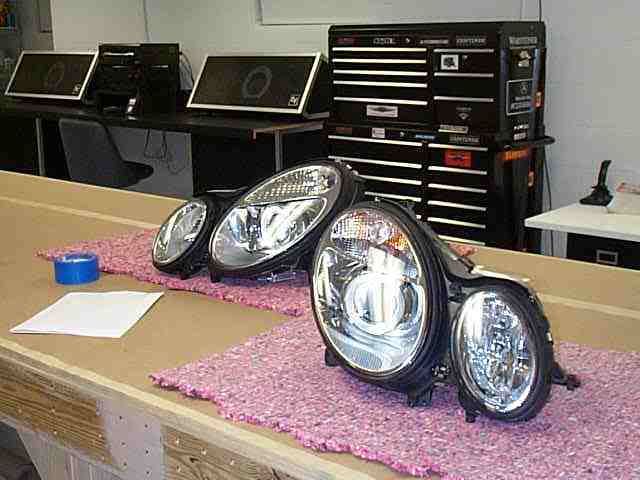
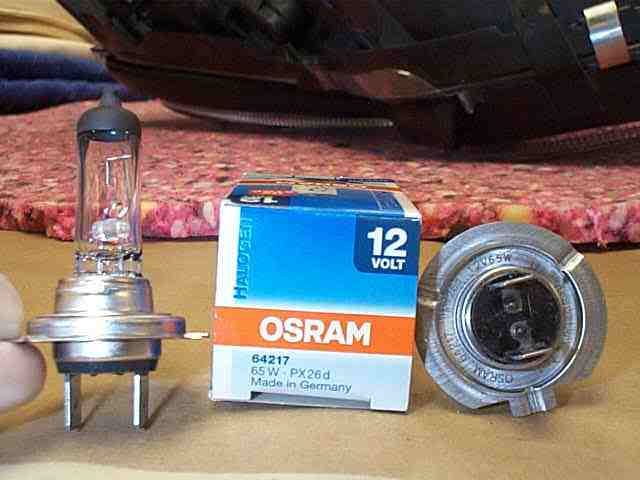
The new OEM Bi Xenon (without active).
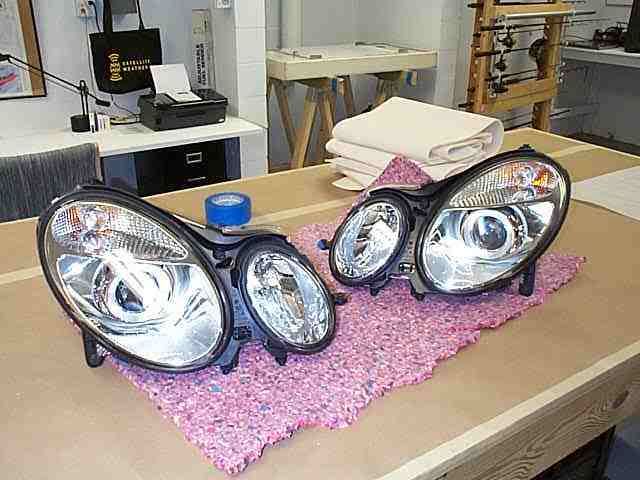
The real deal, 100% made in Germany
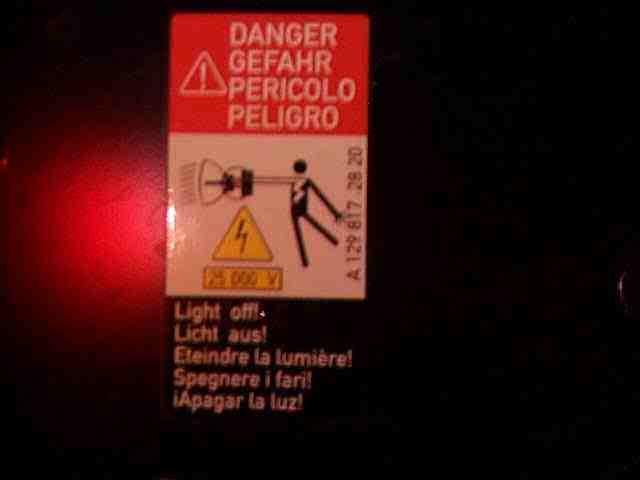
This warning sticker fooled me, it is over the headlamps on both sides, I took it to mean the head lamps had 25000 volts. WRONG, just plain old 12V halogen.
Beast eyes and radar detector.
2X laser scramblers
Tools you will need small pliers, dentist hook, 8mm, 10mm sockets with ratchet and driver handle, 13mm open end wrench, #20 torx screw driver and small and large common screw drivers, a mallet, rags to clean up and some small tywraps a little grease. So the tool box should look like this.
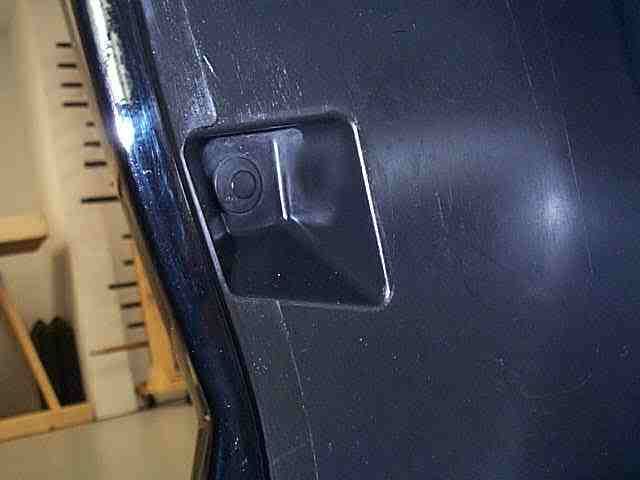
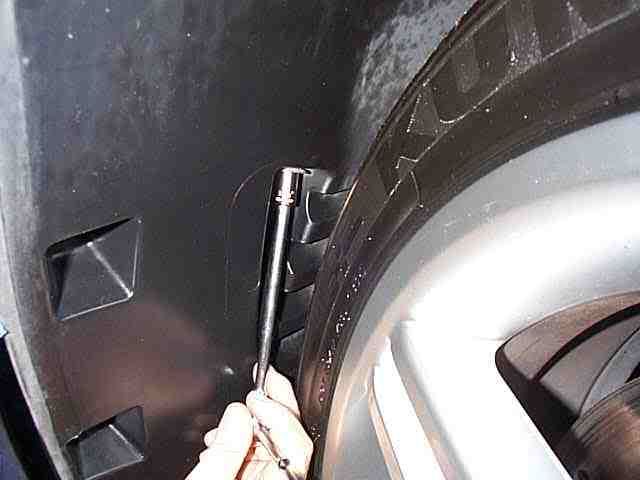
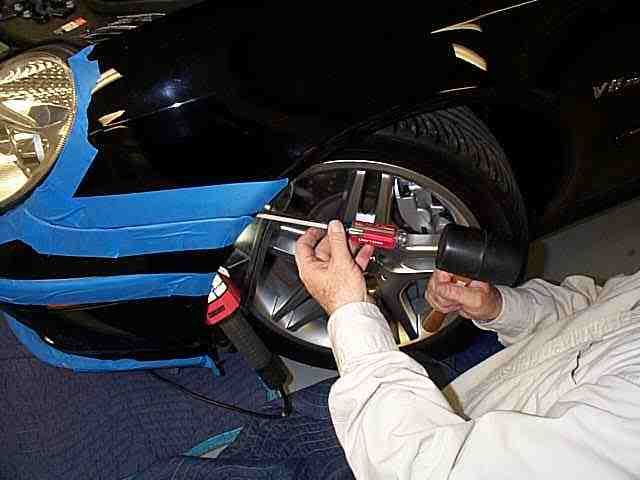
OK start the car and push the raise vehicle button. As you work from side to side you will have to turn the steering wheel to get enough room to perform the tasks here. First thing is to remove the push lock fasteners in the lower wheel well
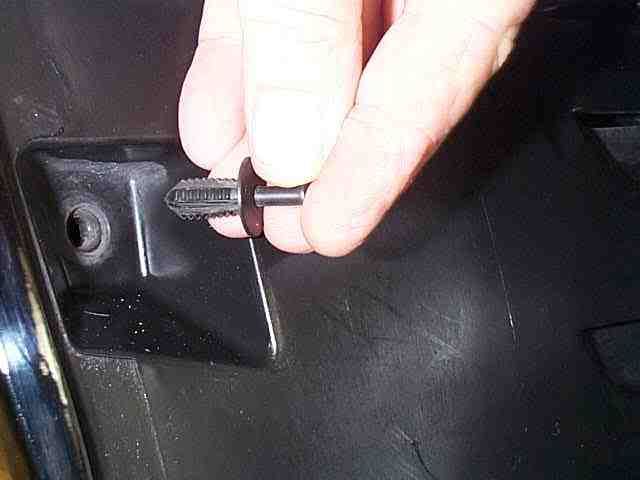
Use your pliers to pull the center out then remove the whole fastener
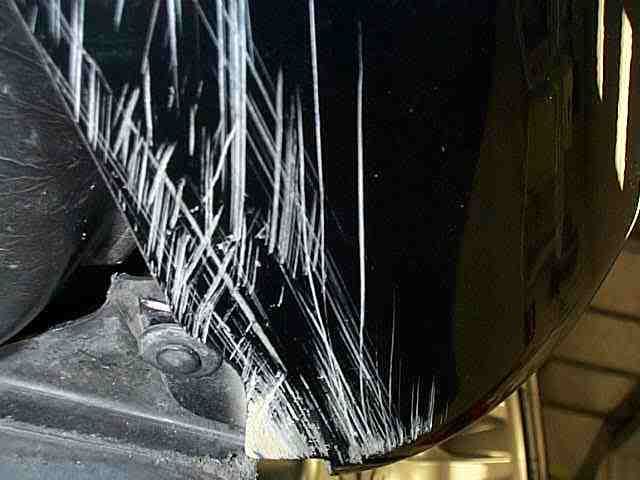
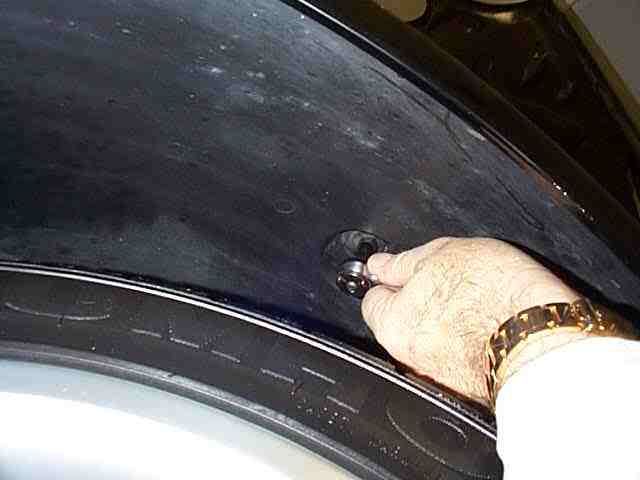
Now remove the one below it is underneath at the front of wheel well Yes I know, lots of scratches. ouch
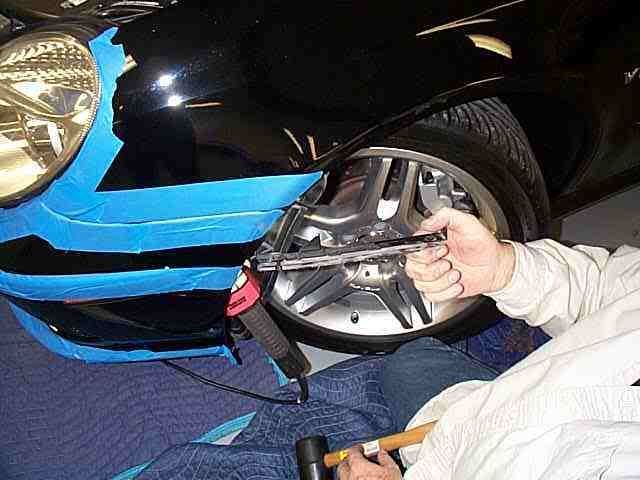
Now Be careful don't break the clipsthe center lower grill clips have a lock that will break. Here is the clip.
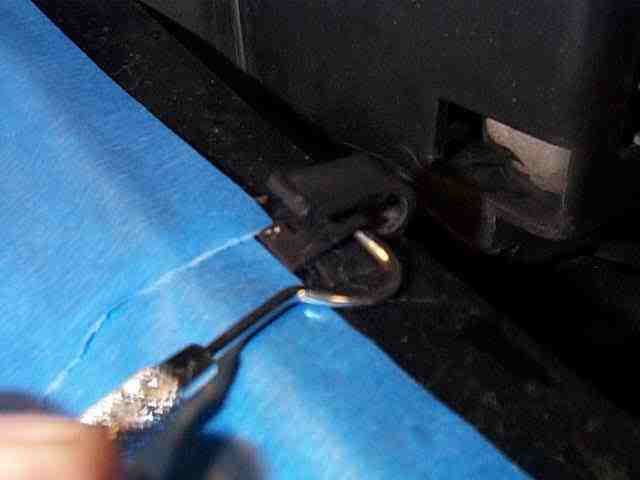
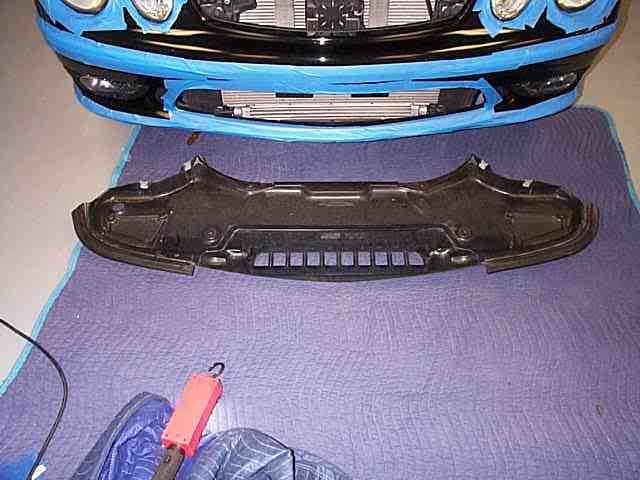
Now remove the center lower grill.
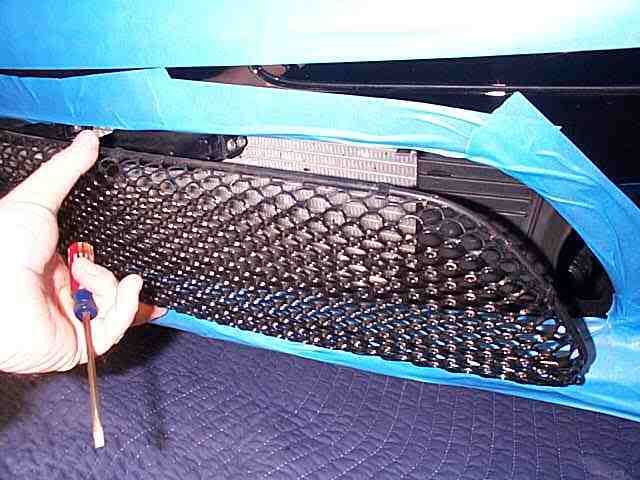
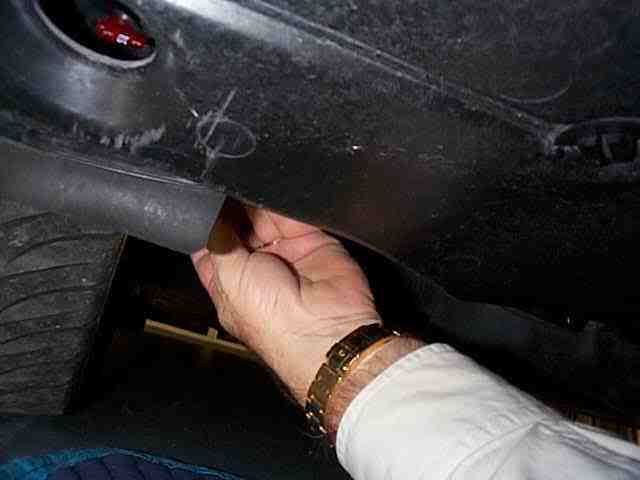
Now remove forward belly pan
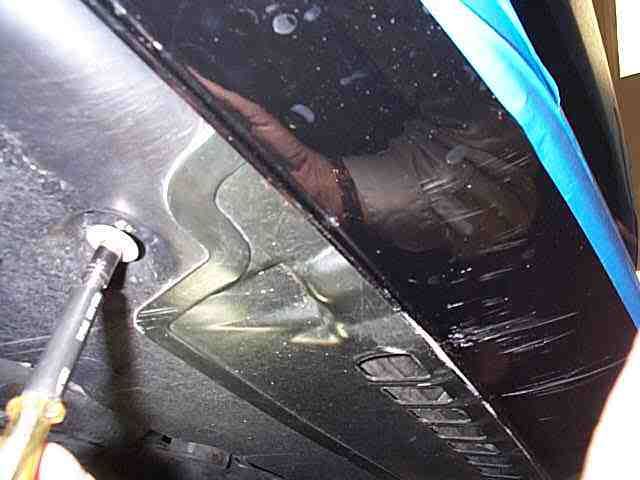
It has 4 8mm screws in the bottom and
Time to wake up!
A good thing to do is study the fitment of your headlamps before the change out.
Short trip to the shop.
Just around the corner.
I use two plastic windows and a glass door to keep cold out and let the sun in when the garage door is open.
In position and ready to start.
The new OEM Bi Xenon (without active).
The real deal, 100% made in Germany
This warning sticker fooled me, it is over the headlamps on both sides, I took it to mean the head lamps had 25000 volts. WRONG, just plain old 12V halogen.
Beast eyes and radar detector.
2X laser scramblers
Tools you will need small pliers, dentist hook, 8mm, 10mm sockets with ratchet and driver handle, 13mm open end wrench, #20 torx screw driver and small and large common screw drivers, a mallet, rags to clean up and some small tywraps a little grease. So the tool box should look like this.
OK start the car and push the raise vehicle button. As you work from side to side you will have to turn the steering wheel to get enough room to perform the tasks here. First thing is to remove the push lock fasteners in the lower wheel well
Use your pliers to pull the center out then remove the whole fastener
Now remove the one below it is underneath at the front of wheel well Yes I know, lots of scratches. ouch
Now Be careful don't break the clipsthe center lower grill clips have a lock that will break. Here is the clip.
Now remove the center lower grill.
Now remove forward belly pan
It has 4 8mm screws in the bottom and
 02-16-2008, 09:35 AM
#2
MBWorld Fanatic!
Thread Starter
Join Date: Oct 2006
Location: Caribbean/Florida/Colorado
Posts: 3,642
Likes: 0
Received 11 Likes
on
11 Posts
E-ZGO 53hp., 1999 E 430 sport, 2004 E 55, 2008 Tahoe LTZ on 24"s
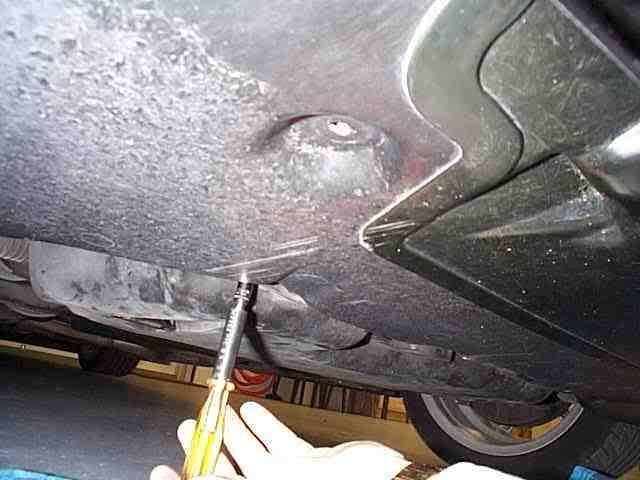
And 4 more screws two in each wheel well
Now a little coaxing will be necessary to get the pan out. I have taped up to avoid any paint damage.
Now back at the lower grill opening at the top remove two 10mm bolts
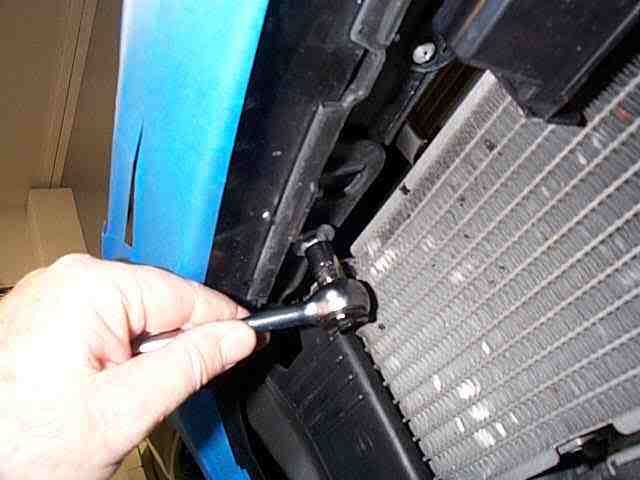
Then the two on top, but leave one or two to keep bumper from falling
Now the 8mm between the lights, use a 13mm wrench to hold mounting nut.
Back to the wheel well remove the 10mm plastic nut (not far from the first push lock)
Next just loosen the 10mm plastic nut at the top of wheel well
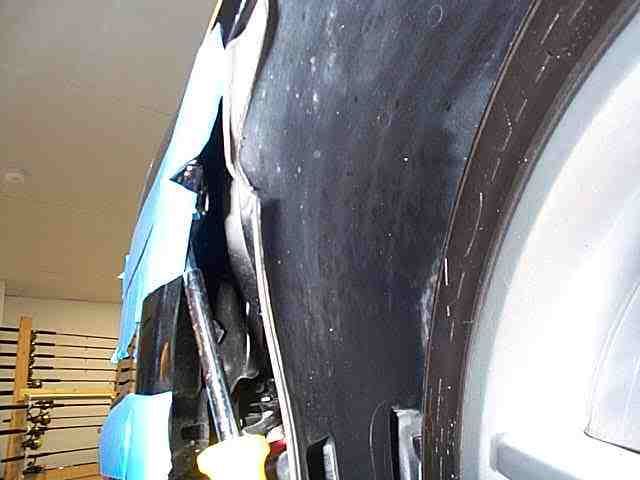
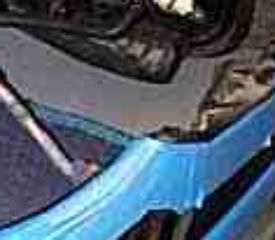
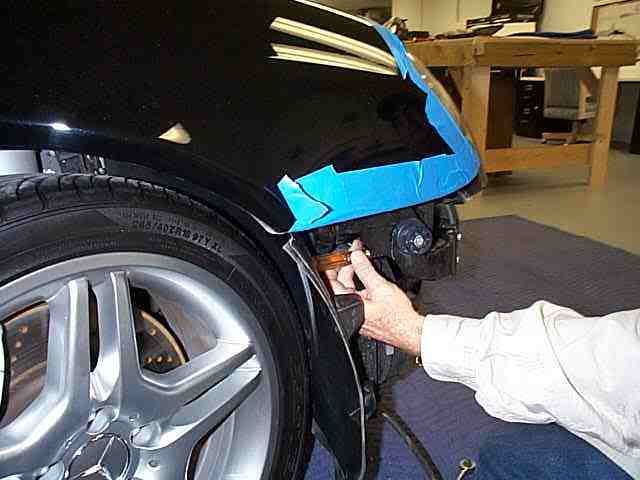
Now pull the inerfender panel out to gain access to the fender to bumper clamp and use #20 torx to remove screw that holds clamp in place.
Gently tap the clamp bracket forward and to the center of the car, it will unhook in a forward motion by hand
You may have to work the clamp back and forth to get it to release.
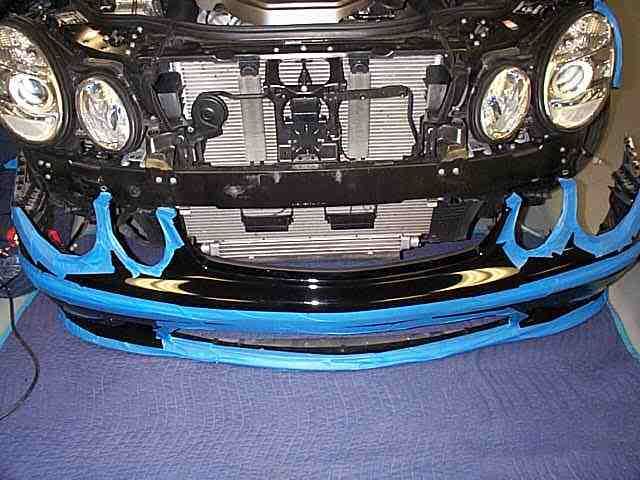
At this point you may need a hand cause the bumper is almost ready to come off, time to disconnect the fog lights, air temp sensor, side marker lights

Remove the other fender to bumper clamp and the two remaining 10mm bolts
and with a little rear ward pressure the last bumper hook at the very front of fender will unhook and the bumper is off.
Break time
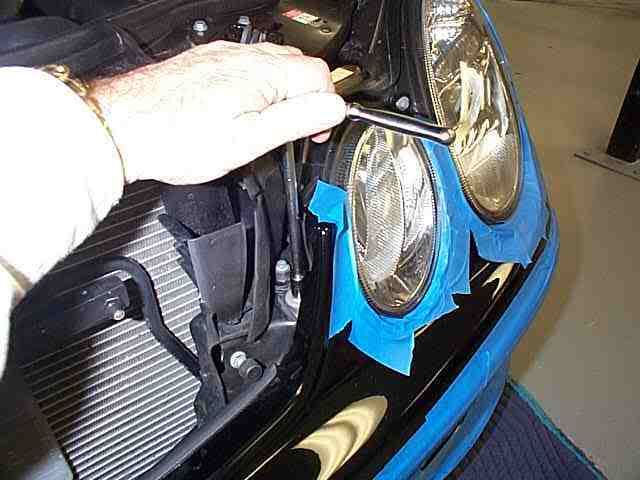
The easy part 8mm nut driver remove the old lamps
Try to not move the clip nuts from their position
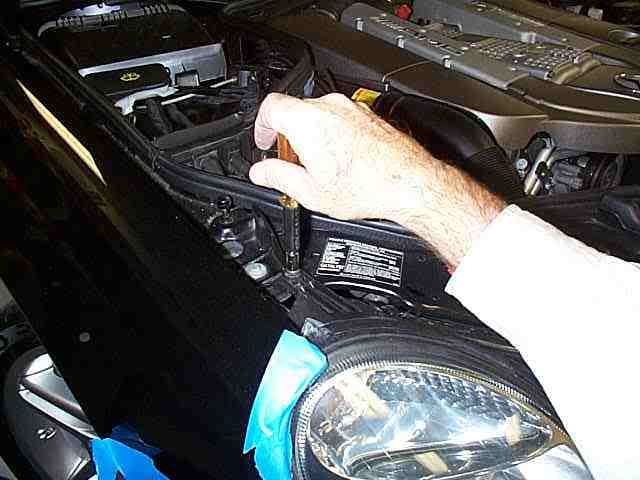
The lower bolt is a pain
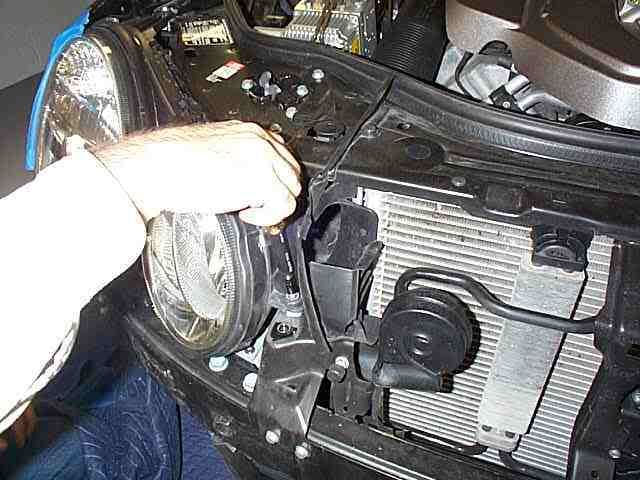
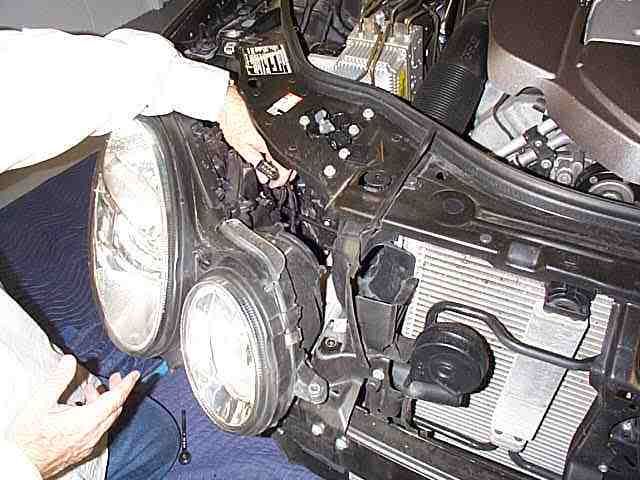
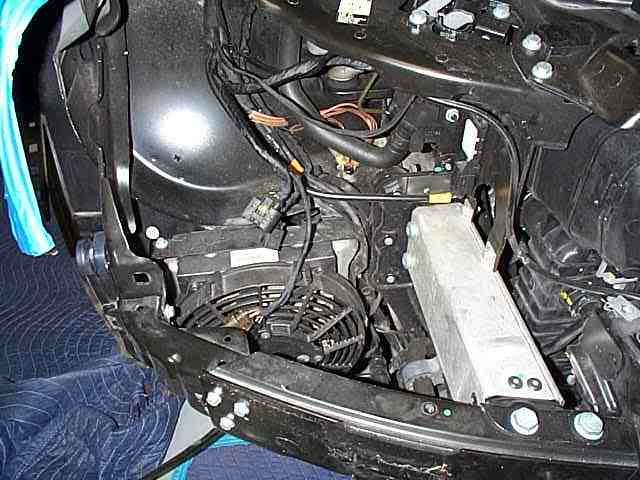
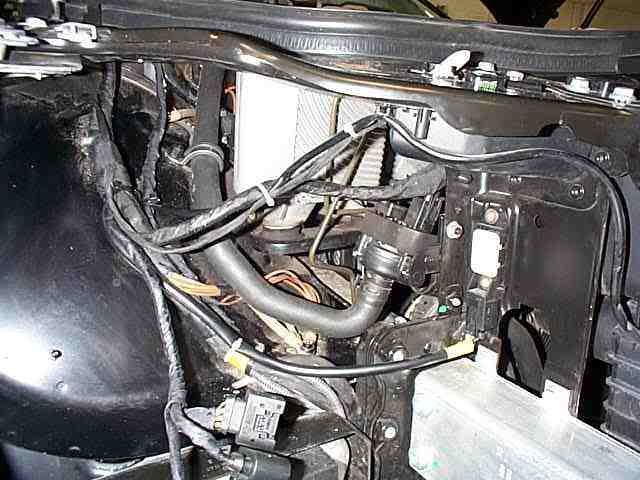
disconnect the 4 wires to the headlamp and remove it
Little clean up and tywraps
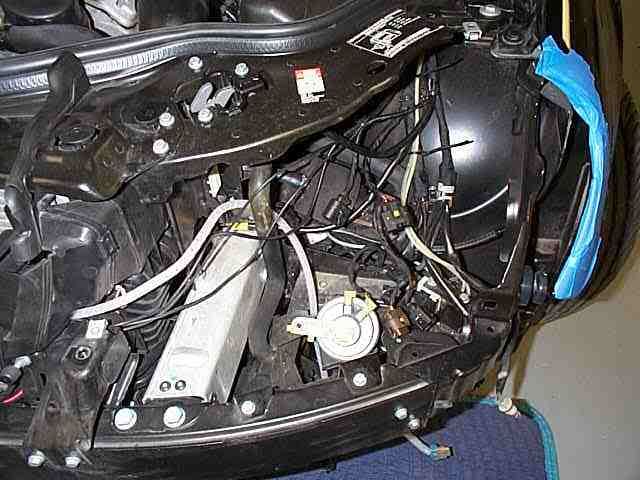
and the other side too
Now a little coaxing will be necessary to get the pan out. I have taped up to avoid any paint damage.
Now back at the lower grill opening at the top remove two 10mm bolts
Then the two on top, but leave one or two to keep bumper from falling
Now the 8mm between the lights, use a 13mm wrench to hold mounting nut.
Back to the wheel well remove the 10mm plastic nut (not far from the first push lock)
Next just loosen the 10mm plastic nut at the top of wheel well
Now pull the inerfender panel out to gain access to the fender to bumper clamp and use #20 torx to remove screw that holds clamp in place.
Gently tap the clamp bracket forward and to the center of the car, it will unhook in a forward motion by hand
You may have to work the clamp back and forth to get it to release.
At this point you may need a hand cause the bumper is almost ready to come off, time to disconnect the fog lights, air temp sensor, side marker lights
Remove the other fender to bumper clamp and the two remaining 10mm bolts
and with a little rear ward pressure the last bumper hook at the very front of fender will unhook and the bumper is off.
Break time
The easy part 8mm nut driver remove the old lamps
Try to not move the clip nuts from their position
The lower bolt is a pain
disconnect the 4 wires to the headlamp and remove it
Little clean up and tywraps
and the other side too
Last edited by Yacht Master; 02-16-2008 at 07:41 PM.
02-16-2008, 09:37 AM
#3
MBWorld Fanatic!
Thread Starter
Join Date: Oct 2006
Location: Caribbean/Florida/Colorado
Posts: 3,642
Likes: 0
Received 11 Likes
on
11 Posts
E-ZGO 53hp., 1999 E 430 sport, 2004 E 55, 2008 Tahoe LTZ on 24"s
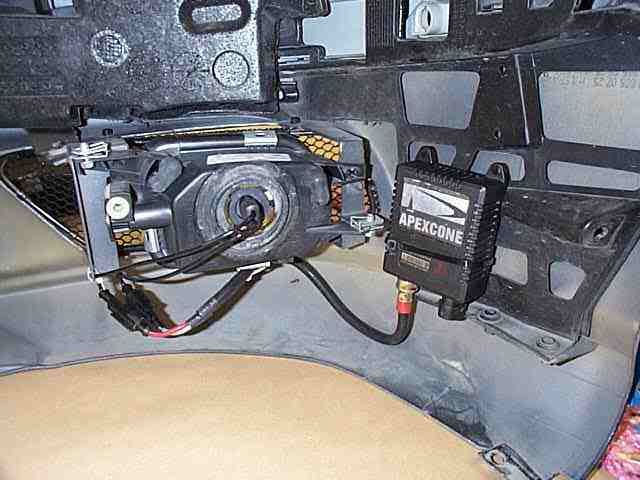
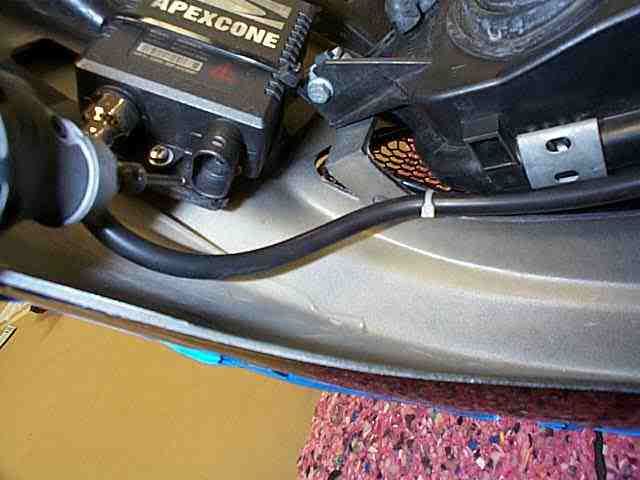
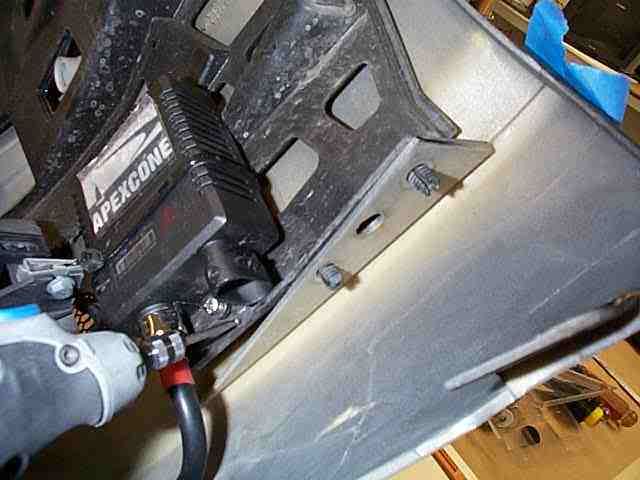
At this point we are ready to reassemble, I have an HID kit on my fog lamps and this is a great time to "clean up that install" I need to grind a little notch for the fog lamp wires.
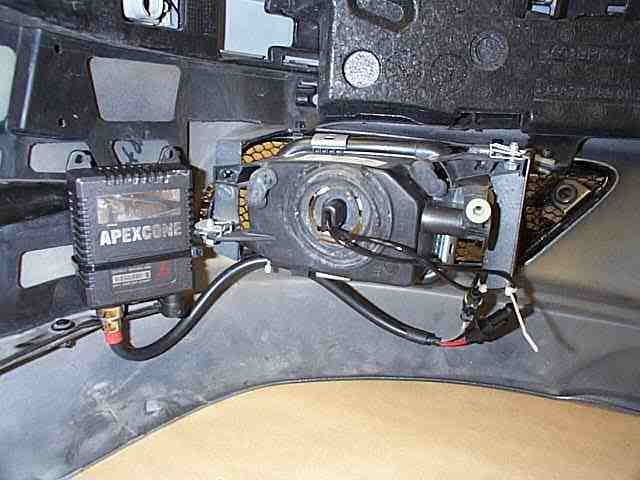
And a little grind on the other side is needed, I'll remount ballasts too
Time to prep car, here I put a light grease film to the fender so that the clamp will slide back in to position correctly.

All the wires are checked for routing and solid connections, then tied in position on both sides
Now you must set the mount nuts on the lamp to the same hight as your old lamp, set all 8 four on each
This is a good time to upgrade any bulbs, I changed my city lights and changed high beam to 65 watt.
Now install both lamps & plug in wires and test. Do not start the car yet just turn on ignition and check function of all lights. You will need to get the car version coded at a dealer for the new Bi Xenon to work correctly when the engine is running, dealer must set Star Diagnostics to Xenon present.
Last minute dremel work
The HID kit came from Creative a sponsor here and will not throw a malfunction code like many HID kits will.
OK time to replace the bumper, just the reverse order, don't forget the side marker lamps, I thought the fender to bumper clamp would give fits but a little grease and no problem. I would say this work took me 4 hours total time.
Hope it serves as reasonable guide.

Done, now for the version coding at the dealer.
And a little grind on the other side is needed, I'll remount ballasts too
Time to prep car, here I put a light grease film to the fender so that the clamp will slide back in to position correctly.
All the wires are checked for routing and solid connections, then tied in position on both sides
Now you must set the mount nuts on the lamp to the same hight as your old lamp, set all 8 four on each
This is a good time to upgrade any bulbs, I changed my city lights and changed high beam to 65 watt.
Now install both lamps & plug in wires and test. Do not start the car yet just turn on ignition and check function of all lights. You will need to get the car version coded at a dealer for the new Bi Xenon to work correctly when the engine is running, dealer must set Star Diagnostics to Xenon present.
Last minute dremel work
The HID kit came from Creative a sponsor here and will not throw a malfunction code like many HID kits will.
OK time to replace the bumper, just the reverse order, don't forget the side marker lamps, I thought the fender to bumper clamp would give fits but a little grease and no problem. I would say this work took me 4 hours total time.
Hope it serves as reasonable guide.
Done, now for the version coding at the dealer.
Last edited by Yacht Master; 02-16-2008 at 07:38 PM.


Trending Topics
02-16-2008, 09:05 PM
#9
Member

Great work!
Thanks for sharing - did you get the lamps new from a stealer or is there a cheaper source?
Some day I will have to do the same modification - but it seems only after I put in some more work on my 'toolbox' - that is
Some day I will have to do the same modification - but it seems only after I put in some more work on my 'toolbox' - that is

 02-18-2008, 11:42 AM
#16
Member

Join Date: Dec 2007
Location: Orange County, CA
Posts: 125
Likes: 0
Received 1 Like
on
1 Post
2004 MB E-500 & 2000 Honda Accord Coupe
Awesome DIY on removing front bumper. Nicely done.
I guess the tool box will give you all the courage you need to do this kind of work.
on your tool box.
Already print this thread as PDF for my future reference.
I guess the tool box will give you all the courage you need to do this kind of work.
on your tool box.Already print this thread as PDF for my future reference.
Last edited by Roehl; 02-18-2008 at 11:46 AM.
 02-19-2008, 02:02 PM
#22
MBWorld Fanatic!
Thread Starter
Join Date: Oct 2006
Location: Caribbean/Florida/Colorado
Posts: 3,642
Likes: 0
Received 11 Likes
on
11 Posts
E-ZGO 53hp., 1999 E 430 sport, 2004 E 55, 2008 Tahoe LTZ on 24"s
DFW01E55, MIG-E55Rocket, Vader55, ucsdsig, raymond g-, BenzoBoi, nlpamg,
SPNJHockey, Roehl, BrianS, ChicagoX, starbrite, Can Drive 55
Thanks guys, When I got my E55 I truly though it had the Bi Xenon lights, what a let down it was to find out differently, anyway that is in the past now. I do appreciate your comments.
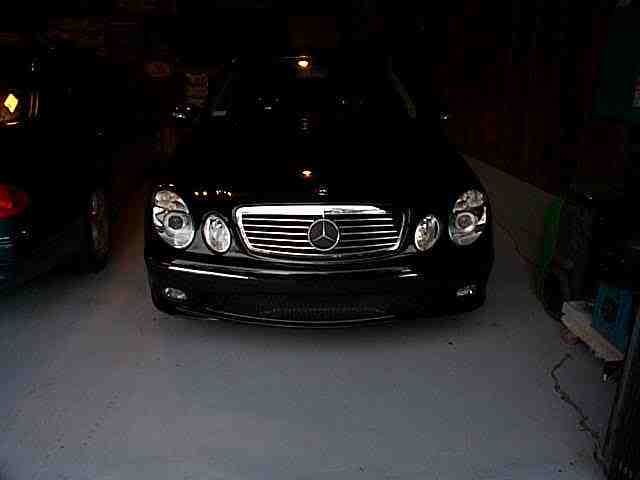
Zod The beast has eyes!
very nicly done
did you install those eyes to or is it a photo shop thing?
if not show more pics of it plz
Zod, real beast eyes, I just have the one pic of the inner workings of the beast eyes, it is pic #11 all they are is license plate bolts with a 12v red led mounted to a piece of aluminum. I got them at a local Pep Boys, in the rice department.
CA_E55 Thanks for sharing - did you get the lamps new from a stealer or is there a cheaper source?
Some day I will have to do the same modification - but it seems only after I put in some more work on my 'toolbox' - that is
CA_E55 Yes much cheaper source than stealer. I shopped the web and found advertised prices from $1250 to $1450 plus shipping.
jamusa I understand that while the lamp will work perfect,the lamp will not make that self adjustment upon sart up.
jamusa True, As far as I understand the self leveling will not function, and like the halogen will be fixed. One person did tell me the cars equipped with DC Air matic just need a sensor activated, I doubt this but, I do plan to check in to that automatic leveling and the possibility of the Euro manual level in the near future. More to come on this topic.
sack5000 Very nice and impressive write-up. Just out of curiousity, what would this job cost if hired?
sack5000, The dealer prices that I have read about here and at Benzworld are all over the place $3500 to $7000, the dealers charge so much it is just silly. A good independent should be able to do this for around $2K, $1400 lamps $600 labor (but much more for automatic level and active).
Abboushi Great Write up, Excellent info. working on the E with the Rolex lol...
Abboushi, Thanks, If I take my watch off I lose my balance.
SPNJHockey, Roehl, BrianS, ChicagoX, starbrite, Can Drive 55
Thanks guys, When I got my E55 I truly though it had the Bi Xenon lights, what a let down it was to find out differently, anyway that is in the past now. I do appreciate your comments.
Zod The beast has eyes!
very nicly done
did you install those eyes to or is it a photo shop thing?
if not show more pics of it plz
Zod, real beast eyes, I just have the one pic of the inner workings of the beast eyes, it is pic #11 all they are is license plate bolts with a 12v red led mounted to a piece of aluminum. I got them at a local Pep Boys, in the rice department.
CA_E55 Thanks for sharing - did you get the lamps new from a stealer or is there a cheaper source?
Some day I will have to do the same modification - but it seems only after I put in some more work on my 'toolbox' - that is
CA_E55 Yes much cheaper source than stealer. I shopped the web and found advertised prices from $1250 to $1450 plus shipping.
jamusa I understand that while the lamp will work perfect,the lamp will not make that self adjustment upon sart up.
jamusa True, As far as I understand the self leveling will not function, and like the halogen will be fixed. One person did tell me the cars equipped with DC Air matic just need a sensor activated, I doubt this but, I do plan to check in to that automatic leveling and the possibility of the Euro manual level in the near future. More to come on this topic.
sack5000 Very nice and impressive write-up. Just out of curiousity, what would this job cost if hired?
sack5000, The dealer prices that I have read about here and at Benzworld are all over the place $3500 to $7000, the dealers charge so much it is just silly. A good independent should be able to do this for around $2K, $1400 lamps $600 labor (but much more for automatic level and active).
Abboushi Great Write up, Excellent info. working on the E with the Rolex lol...
Abboushi, Thanks, If I take my watch off I lose my balance.
02-20-2008, 06:34 AM
#23
MBWorld Fanatic!

Join Date: Apr 2005
Location: Brisbane, Australia
Posts: 1,117
Likes: 0
Received 0 Likes
on
0 Posts
2003 E55
Fantastic write up.
Just one comment the voltage warning is real. The ballast/transformer does produce very high voltage to power the Xenon bulbs (its not a hot filament but 'plasmarised' gas) - be careful!
Just one comment the voltage warning is real. The ballast/transformer does produce very high voltage to power the Xenon bulbs (its not a hot filament but 'plasmarised' gas) - be careful!
02-20-2008, 01:35 PM
#24
Super Member
Join Date: Dec 2005
Posts: 504
Likes: 0
Received 0 Likes
on
0 Posts
Surprise surprise.....took my car to have it align,got a called that someone with a new E class totalled their car with zenon lamps and had the lamps for sale....i gave the ok to install them.They said it turn out butiful,but no self leveling.Picking up car today will let u know how i like it and how much it cost.
02-23-2008, 08:53 PM
#25
Member
Join Date: Apr 2006
Location: Louisiana
Posts: 113
Likes: 0
Received 0 Likes
on
0 Posts
03 E500 Sport, 03 Eddie Bauer Explorer, 06 Pro Street Chopper
Great DIY info. Would it be possible to remove the lense without removing the bumper to get the housing out?


