Steering Wheel Swap, Step By Step with Pics
 06-06-2005, 02:35 PM
#1
Senior Member
Thread Starter

Join Date: Mar 2005
Location: By the City by the Bay, CA
Posts: 462
Likes: 0
Received 0 Likes
on
0 Posts
2001 E320 (210.065), Brilliant Silver; 2002 Ducati ST-2, Arrest-me Red
Okay, folks, I finally got around to changing my W210 steering wheel. This basic procedure is the same for pretty much all of the MBZ vehicles with airbags.
First, a few caveats. Remember that this is a basic procedure, but not for the faint of heart. Make a misstep and you could end up with a mess; having an airbag explode in your face is neither fun nor cheap. Second, be prepared; once you have the airbag assembly off is not the time to find out you don't have the tool necessary to pull the retaining bolt.
Third, take your time; no sense in rushing. Last, be sure you have your owner's manual and radio code handy for all the reset procedures.
STEP ONE. Bring the steering wheel to almost center; I left it slightly left (as you can see in the photo) to permit easier access to the left airbag assembly bolt. Extend the steering wheel from the dash as far as it will go.
STEP TWO. Disconnect the negative lead from the battery. You can access the lead from the snap-off cover in front of the right-side rear passenger seat. It's a 7/16" nut. Be sure you have unlocked all doors and that the vehicle key is in your pocket. Close the door to extinguish the dome light, then remove the nut and pull the lug off the terminal end. I stuck the plastic cover halfway back in to ensure the cable lug wouldn't drift back over and make contact.
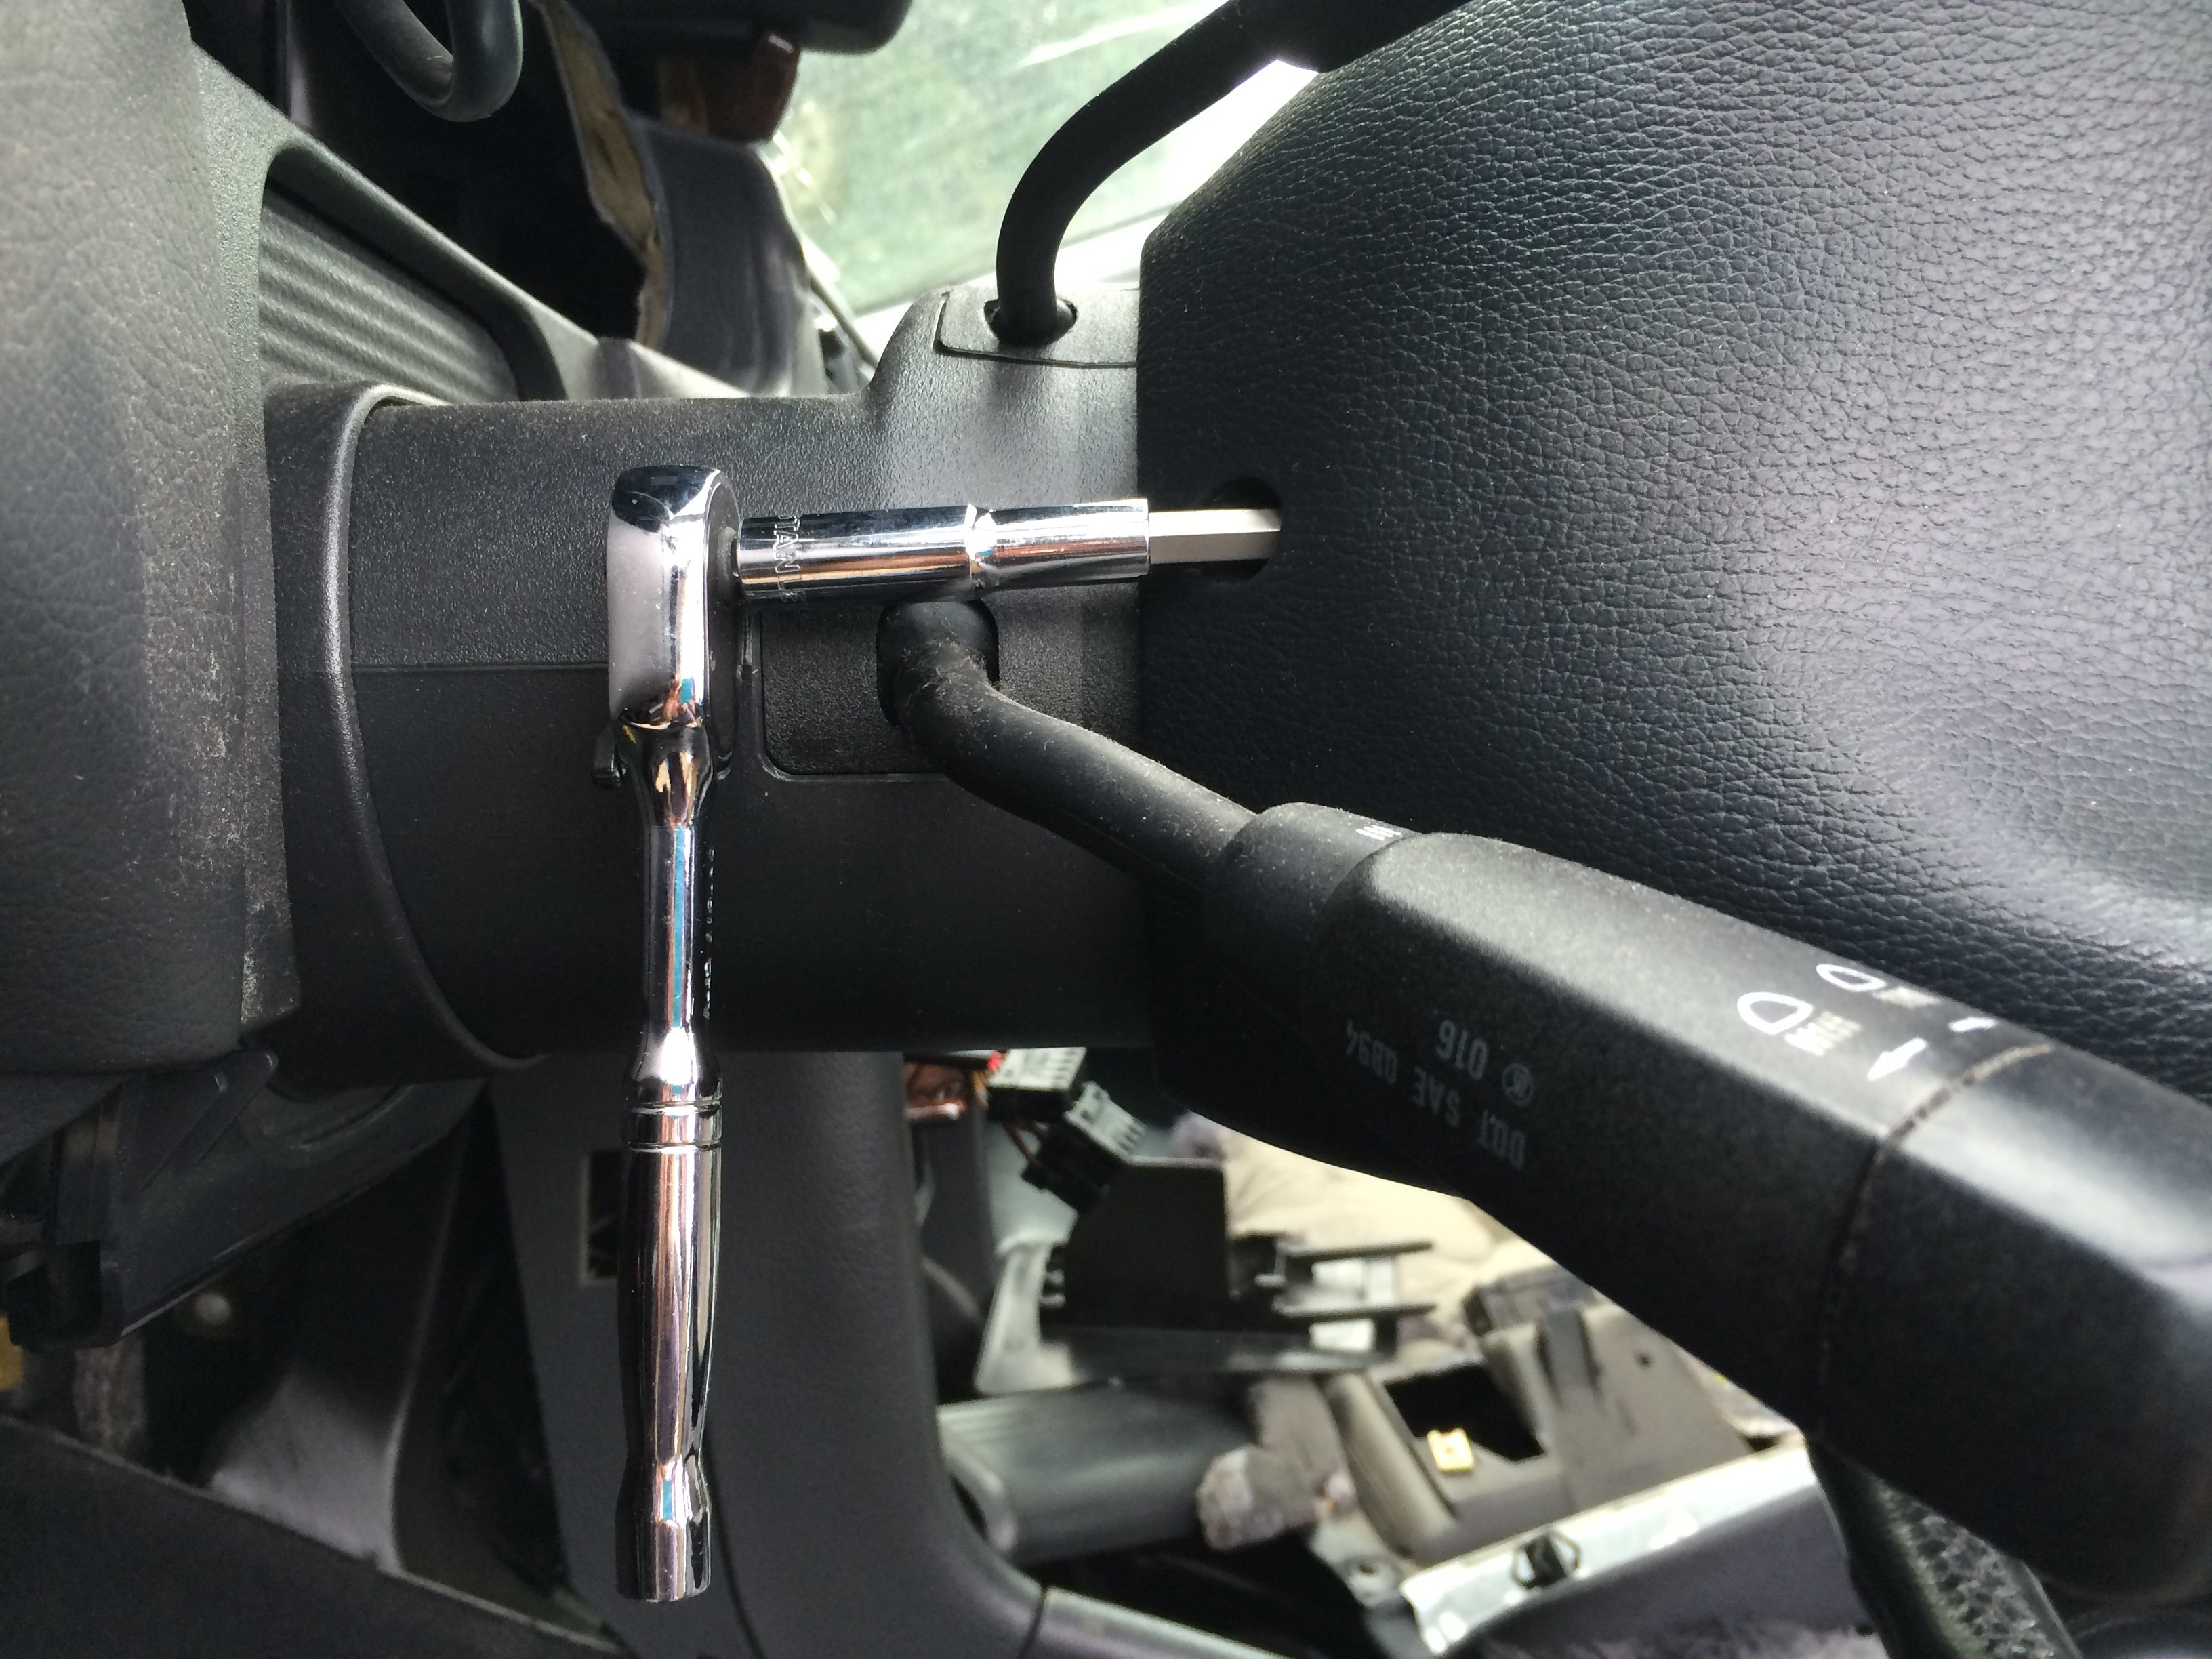
STEP THREE. Loosen each of the airbag assembly retaining screws. They are T30 Torx, but you can use an allen wrench if you desire. Although I had a torx socket, the hole provided is too small for anything other than a straight-shaft tool, so I ended up using a 5/32 allen wrench and a cheater to get enough torque to loosen these screws. Once each of the screws is loose, go ahead and completely loosen them. They will remain in the steering wheel, so you'll have to periodically pull on the airbag assembly to see if you're finished loosening them.
First, a few caveats. Remember that this is a basic procedure, but not for the faint of heart. Make a misstep and you could end up with a mess; having an airbag explode in your face is neither fun nor cheap. Second, be prepared; once you have the airbag assembly off is not the time to find out you don't have the tool necessary to pull the retaining bolt.
Third, take your time; no sense in rushing. Last, be sure you have your owner's manual and radio code handy for all the reset procedures.
STEP ONE. Bring the steering wheel to almost center; I left it slightly left (as you can see in the photo) to permit easier access to the left airbag assembly bolt. Extend the steering wheel from the dash as far as it will go.
STEP TWO. Disconnect the negative lead from the battery. You can access the lead from the snap-off cover in front of the right-side rear passenger seat. It's a 7/16" nut. Be sure you have unlocked all doors and that the vehicle key is in your pocket. Close the door to extinguish the dome light, then remove the nut and pull the lug off the terminal end. I stuck the plastic cover halfway back in to ensure the cable lug wouldn't drift back over and make contact.
STEP THREE. Loosen each of the airbag assembly retaining screws. They are T30 Torx, but you can use an allen wrench if you desire. Although I had a torx socket, the hole provided is too small for anything other than a straight-shaft tool, so I ended up using a 5/32 allen wrench and a cheater to get enough torque to loosen these screws. Once each of the screws is loose, go ahead and completely loosen them. They will remain in the steering wheel, so you'll have to periodically pull on the airbag assembly to see if you're finished loosening them.
 06-06-2005, 02:37 PM
#2
Senior Member
Thread Starter
Join Date: Mar 2005
Location: By the City by the Bay, CA
Posts: 462
Likes: 0
Received 0 Likes
on
0 Posts
2001 E320 (210.065), Brilliant Silver; 2002 Ducati ST-2, Arrest-me Red
STEP FOUR. Gently pull the airbag assembly away from the steering wheel and rotate it as in the picture. Pull the yellow airbag connector straight off the airbag and then disconnect the other connector. Remove the airbag assembly and set it somewhere safe.
STEP FIVE. Use a 10mm allen-head socket to loosen the steering wheel retaining bolt. This bolt has a tapered seat and will be very tight to break loose. Don't use the steering wheel lock but rather have a helper hold the steering wheel while you loosen it. When the bolt is quite loose tug on the steering wheel; it should slide forward. If not, have the holder pull on it while you use a small piece of wood and a hammer to strike a blow to the retaining bolt. Don't hit your helper!")
STEP SIX. With the wheel able to move, remove the tapered retaining bolt and, supporting the wheel with one hand, carefully feed the connector wires and ends through the hole noted in the picture. Remove the wheel.
STEP FIVE. Use a 10mm allen-head socket to loosen the steering wheel retaining bolt. This bolt has a tapered seat and will be very tight to break loose. Don't use the steering wheel lock but rather have a helper hold the steering wheel while you loosen it. When the bolt is quite loose tug on the steering wheel; it should slide forward. If not, have the holder pull on it while you use a small piece of wood and a hammer to strike a blow to the retaining bolt. Don't hit your helper!
STEP SIX. With the wheel able to move, remove the tapered retaining bolt and, supporting the wheel with one hand, carefully feed the connector wires and ends through the hole noted in the picture. Remove the wheel.
06-06-2005, 02:39 PM
#3
Senior Member
Thread Starter
Join Date: Mar 2005
Location: By the City by the Bay, CA
Posts: 462
Likes: 0
Received 0 Likes
on
0 Posts
2001 E320 (210.065), Brilliant Silver; 2002 Ducati ST-2, Arrest-me Red
STEP SEVEN. Support the new wheel and feed the wires back through the same hole. Line up the wheel and place it in position, securing it with the retaining bolt. 60-70 ft. lbs. should be fine; once the taper seat hits, torque will rise dramatically.
STEP EIGHT. Reinstall the airbag assembly, connect the general connector first, and then the airbag connector. Align the airbag assembly into place and start the two screws, then tighten them.
STEP NINE. Close the doors and reconnect the battery. Replace the plastic cover.
STEP TEN. Go through the manual's procedures to correct the malfunction warnings, reset the power windows and enable your radio.
STEP ELEVEN. Go for a drive, enjoy the new feeling!
Take care and enjoy the ride,
Greg
06-07-2005, 11:44 AM
#4
Super Member

Join Date: Dec 2004
Location: TX
Posts: 620
Likes: 0
Received 1 Like
on
1 Post
13 Lunar Blue GL550, 06 Imola Red BMW X5 4.8is, 04 Gold Honda Ody
Looks Great Greg.
Thanks for the detailed information. Did you install the eibachs/bilstein's yet. If so how do you like them?
Thanks for the detailed information. Did you install the eibachs/bilstein's yet. If so how do you like them?
06-07-2005, 12:43 PM
#6
MBWorld Fanatic!
Join Date: Apr 2003
Location: HK (but constantly travelling)
Posts: 4,169
Likes: 0
Received 2 Likes
on
2 Posts
98 W210 Advantgarde
Great write up Greg...as with your brake thing. One thing that's missing (from a quick scan of the text) is to make sure the key is out of the ignition at all times.

Trending Topics


 06-08-2005, 01:09 AM
#11
Senior Member

It looks good, great write up. How much did the wheel set you back, i know it had to cost at least a leg and an arm.
06-09-2005, 04:10 AM
#12
MBWorld Fanatic!
Greate step by step. Thanks. BTW What's lever from right side of a steering wheel? I seem to do not have such.
And last, does anybody know who's selling bird eye wood-leather steering wheels?
And last, does anybody know who's selling bird eye wood-leather steering wheels?
06-09-2005, 11:33 AM
#13
Senior Member
Thread Starter
Join Date: Mar 2005
Location: By the City by the Bay, CA
Posts: 462
Likes: 0
Received 0 Likes
on
0 Posts
2001 E320 (210.065), Brilliant Silver; 2002 Ducati ST-2, Arrest-me Red
Originally Posted by Dema
Greate step by step. Thanks. BTW What's lever from right side of a steering wheel? I seem to do not have such.
And last, does anybody know who's selling bird eye wood-leather steering wheels?
And last, does anybody know who's selling bird eye wood-leather steering wheels?

Check formymercedes.com on the birds-eye. Member SBARSAP got his from the DANA guy that also sells them off e-bay (and directly) but he's in Europe, so there's another $75 or so for shipping. He does do beautiful work...you can see it in SBARSAP's post on his wheel.
Enjoy the ride,
Greg
06-09-2005, 11:36 AM
#14
Senior Member
Thread Starter
Join Date: Mar 2005
Location: By the City by the Bay, CA
Posts: 462
Likes: 0
Received 0 Likes
on
0 Posts
2001 E320 (210.065), Brilliant Silver; 2002 Ducati ST-2, Arrest-me Red
Originally Posted by Whitey
Great write up Greg...as with your brake thing. One thing that's missing (from a quick scan of the text) is to make sure the key is out of the ignition at all times.
Actually, you want to keep the key in your pocket not always, but AFTER you've extended the steering wheel.
I'd have hated life if I'd gotten the battery off and then realized I needed to extend the wheel to get to the AB screws. 
Take care, man. How's HK these days?
Last edited by Gregs210; 06-09-2005 at 11:40 AM.
06-09-2005, 11:51 AM
#15
MBWorld Fanatic!
Join Date: Apr 2003
Location: HK (but constantly travelling)
Posts: 4,169
Likes: 0
Received 2 Likes
on
2 Posts
98 W210 Advantgarde
Hahahhaha, yeah good point........or you could get a shorter torx driver 
HK's just fine, a little confused about which country it belongs to but luckily retaining its autonomy....so they say.....gas and cars still expensive as ever.
Enjoy the big boy's wheel....I'm sure it would have been well cared for (and probably hardly used ) 
HK's just fine, a little confused about which country it belongs to but luckily retaining its autonomy....so they say.....gas and cars still expensive as ever.
Enjoy the big boy's wheel....I'm sure it would have been well cared for (and probably hardly used
)
06-09-2005, 04:59 PM
#17
Senior Member
Thread Starter
Join Date: Mar 2005
Location: By the City by the Bay, CA
Posts: 462
Likes: 0
Received 0 Likes
on
0 Posts
2001 E320 (210.065), Brilliant Silver; 2002 Ducati ST-2, Arrest-me Red
Originally Posted by hadam
Greg. Good work buddy.
Can this be done with 97-99 W210 where steering wheels does not have radio and other control on it ??

Can this be done with 97-99 W210 where steering wheels does not have radio and other control on it ??
You still have an airbag, though, right? Does it look like the attached pic? I'm 99% sure the wheel is the same for all airbag-equipped W210s, since your airbag assembly swaps out you just wouldn't have the additional wiring connectors. If you look back up at the pics, the one after I've removed the airbag assembly, that's the wheel itself which is all you really swap out.
Take care and enjoy the ride,
Greg
 12-01-2009, 02:55 PM
#19
Newbie

Join Date: Nov 2009
Posts: 1
Likes: 0
Received 0 Likes
on
0 Posts
e320
I ran into this thread a few days ago. I followed the directions and most everything worked out well in my 1999 e320. A few comments:
1. Have a torch ready for the wheels retaining bolt. It has loctite and will require heat before attempting any removal. I used a breaker bar with no extension and without using an impact gun. The bolt came out fairly easily. I removed it without any assistance. I used my "club" security bar attached to one of the wheel spokes and the other end braced against the floor in order to immobilize the wheel.
2. If you are just replacing the wheel, it is a very straight forward operation.
3. If you are replacing the turn signal, it is also straight forward. Just take your time to remove and replace everthing in the same sequence.
4. However, if you are replacing your cruise control switch, you may encounter the same problem I did. It was extremely difficult to reach the harness that is attached to the ignition cluster. I tried everthing and was unable to reach it without performing major disassembly. I instead, opted to splice the wires from the old harness and attached them the new switch (you must splice the wires on the new switch as well). IF YOU DON'T HAVE ANY ELECTRICAL EXPERIENCE, PLEASE BE SURE TO LOOK AT SOME EXAMPLES PRIOR TO SPLICING WIRES. The process is very easy, it is just important to do it properly to avoid any shorts or malfunctions. It is no different than splicing and joining any othe type of wires. This proved to be much faster and easier than disassembling the other components.
05-21-2011, 06:19 PM
#20
Newbie

Join Date: May 2011
Posts: 2
Likes: 0
Received 0 Likes
on
0 Posts
2002 430 E
steering wheel
your wheel looks great!!!! Just wandering if I can take out the bolts to the airbag just enough to tighten the wheel without disconnecting any wires or battery cable?
05-24-2011, 06:48 PM
#21
Junior Member

Join Date: Nov 2002
Location: CA (Bay Area)
Posts: 40
Likes: 0
Received 0 Likes
on
0 Posts
2012 E350 - P2, 08 E350 AMG Sport, . 96 E300D 230+k. 03 Limited 4xSequoia & 2011 Volvo C30 R design
Really nice. Thank for the step by step. I replace the door pulls with Burl replacements. They look fantastic, but really need to do the wheel now. Best
11-12-2016, 05:02 PM
#23
Newbie
Join Date: Mar 2016
Posts: 2
Received 0 Likes
on
0 Posts
1999 W210 E300, green, 151k mi. (Mar2016)
STEP THREE. Loosen each of the airbag assembly retaining screws. They are T30 Torx, but you can use an allen wrench if you desire. Although I had torx sockets, the hole provided is too small for anything other than a straight-shaft tool, so I ended up using a 5/32 allen wrench and a cheater to get enough torque to loosen these screws.
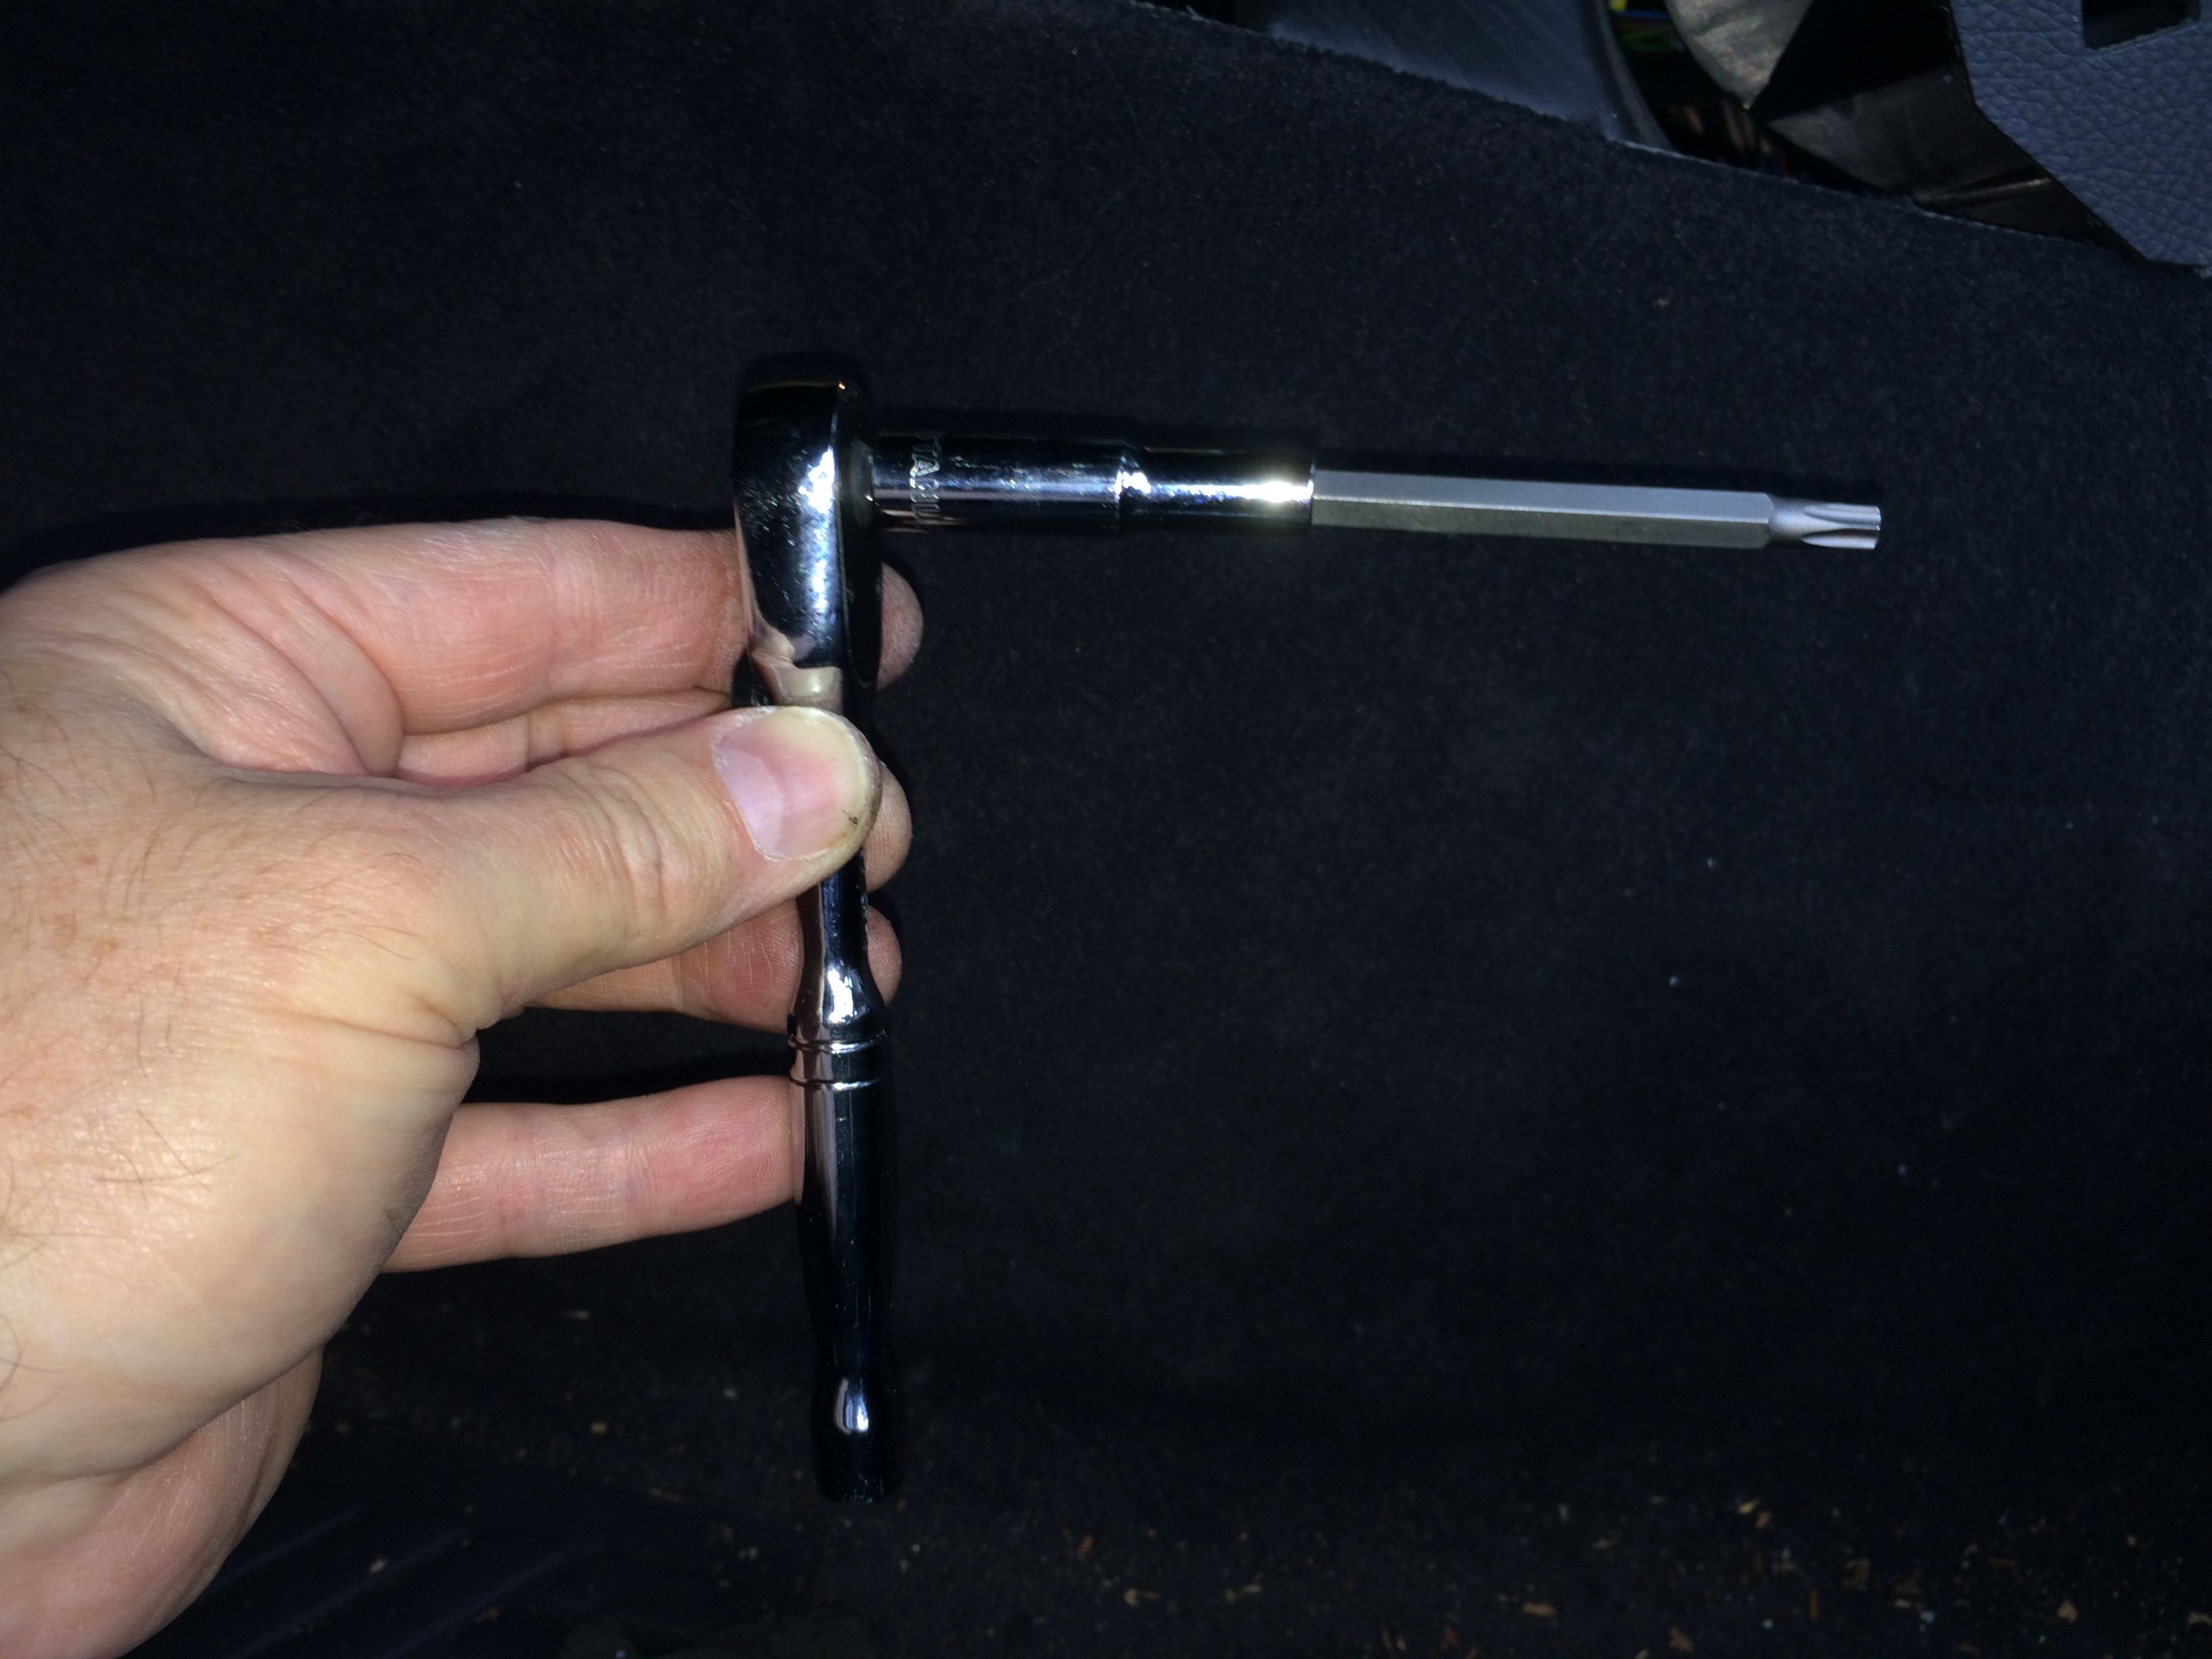
I don't think a full T30 screwdriver could be made to fit in there, it'd probably be a tad too long, and a std-length bit would definitely be too short.
3. If you are replacing the turn signal, it is also straight forward. Just take your time to remove and replace everthing in the same sequence.
4. However, if you are replacing your cruise control switch, you may encounter the same problem I did. It was extremely difficult to reach the harness that is attached to the ignition cluster. I tried everthing and was unable to reach it without performing major disassembly. I instead, opted to splice the wires from the old harness and attached them the new switch (you must splice the wires on the new switch as well).
4. However, if you are replacing your cruise control switch, you may encounter the same problem I did. It was extremely difficult to reach the harness that is attached to the ignition cluster. I tried everthing and was unable to reach it without performing major disassembly. I instead, opted to splice the wires from the old harness and attached them the new switch (you must splice the wires on the new switch as well).
Last edited by asavage; 11-12-2016 at 05:05 PM.
07-01-2019, 11:28 PM
#24

Excellent write-up. One question regarding wheel upgrade.


Lowered 2.6"


Aj-usa had the best price $200. https://www.ajusa.com/shop-by-brand/...iABEgK1ufD_BwE
I have a 97 e420 with a really cracked dash. I have a dash that I pulled out of the local wrecking yard and I'm planning on installing it and a double DIN Burl wood verical dash part and support bracket.
I have everything I need. I'm wondering if it would be possible to change the clock spring and use a later steering wheel with the buttons on the spokes for audio. It seems crazy but since I'll have everything totally out if this would be the time to do it.
I assume the clock spring has the appropriate cables attached to it. But you know what they say about assuming.
07-02-2019, 12:08 AM
#25
MBWorld Fanatic!
let me know how you like the Vogtland springs. I tried them and felt they were too firm so I replaced them with Eibacht.
To dampen the stiffer springs I went with Bilstein HD/Sports which worked much better than the yellow tube Koni 3-way
adjustables which I felt was lacking in dampening rate.
I went with Depo projectors. Is that what you have on there (photo)? Did you replace the factory Xenon with Depo halogen?
To dampen the stiffer springs I went with Bilstein HD/Sports which worked much better than the yellow tube Koni 3-way
adjustables which I felt was lacking in dampening rate.
I went with Depo projectors. Is that what you have on there (photo)? Did you replace the factory Xenon with Depo halogen?
Last edited by raymond g-; 07-02-2019 at 12:15 AM.


